 Maybe it’s the continual barrage of Monday night snowstorms hitting Denver lately, or maybe it’s just me being crazy, but I’m still writing about bikepacking clothing choices. After three posts, hopefully everyone gets the idea that it’s best to have lots of layers that work in a variety of conditions. If you can be comfortable in rain, snow, and wind, why wouldn’t you want to look like this? Alright, I admit that it may not look good, but it works and it’s lightweight.
The previous posts covered how the layers work together for a wide range of temperatures and how the full clothing system works down to temperatures well below freezing. This post will focus on the weight of the layers and how all of the clothing gets packed onto the bike.
Weight Watchers
A 3 season lightweight clothing system cannot be complete without a full weight listing for each item.
| Item | Weight (oz) |
| Bib Shorts | 6.72 |
| Jersey | 6.16 |
| Undershirt | 2.68 |
| Cycling socks | 1.38 |
| Polypro gloves | 1.40 |
| Total for standard layers | 18.34 |
| Arm Warmers | 2.59 |
| Knee Warmers | 3.93 |
| Toe warmers | 1.26 |
| Wool cycling cap with ear flaps | 1.54 |
| GoLite rain jacket | 7.84 |
| ZPacks Rain Mitts | 0.85 |
| ZPacks Rainpris | 2.59 |
| Long wool socks | 3.00 |
| MontBell long sleeve wool baselayer | 4.74 |
| MontBell short sleeve down jacket | 6.22 |
| Total for additional layers | 34.56 |
In my opinion, the standard layers don’t count towards the total weight of items on the bike since they are being worn all of the time. This approach is fairly common for weight weenies in the backpacking community as well. You’re gonna be wearing socks, shorts, and some sort of shirt when riding. I don’t think naked bikepacking would be very comfortable for lots of reasons.
On a mild summer day, all of the layers would stay packed away, except maybe for arm warmers early in the morning. The additional layers weigh in at just over 2 pounds which is about the same weight as a liter of water. For all of us non-metric people, that’s 33 oz of water and yes, I had to search for that conversion.
Pack It In
When arranging my gear for bikepacking, I prefer to keep similar items in the same bags so I don’t have to think about where specific items are located. My entire sleep system goes in the handlebar bag. All of the clothing items go in the seat bag. If I need to store or pull out an item of clothing, I always know where it is located without thinking about it. This technique works as long as the seat bag and handlebar bag are fairly evenly weighted.
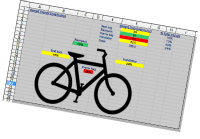
Being a numbers person, I like to see how all of the gear adds up in weight and also if it’s distributed evenly. The gear list template can help you figure this out, and it also serves as a handy checklist when packing for a trip. Click the spreadsheet picture below to open the gear list for my clothing system. For a real trip, I would leave off the standard layers and only include the items that would pack on the bike.
Clothing Is Not Optional
At least when bikepacking it’s not. Being warm and dry when out in the woods can be the difference between an enjoyable trip and a miserable trip. Experiment with various options to find a system that works for your conditions, your types of trips, and your preferences.
Three tips for finding your own system:
- When experimenting, pack a few extra items and keep track of what wasn’t used on your trips. For the next trip, determine if there is something that can be removed from your setup.
- If you have the choice between wool or anything else, wool is usually the better option. It’s pricey, but it works great.
- Test your clothing system on shorter rides before heading out on a bikepacking adventure. On a rainy day, go for a ride in your rain gear to see how long it keeps you dry. On a cold and windy day, put on all of your layers and see if you stay warm enough.
With good rain gear, an insulation layer, and a few other layers, it’s easy to enjoy bikepacking in almost any conditions.

