Rather than going through every piece of gear for my Tour Divide setup, I’m going to discuss some of the “bigger picture” approaches to outfitting a bike for such an adventure. There will be a few gear specific mentions where appropriate.
For you gear junkies, there is a detailed spreadsheet at the bottom of the post that contains every item, the weight, and where it’s stored on the bike.
My overall approach has been to use Colorado based companies where possible. With each item, I looked for simplicity, lack of breakable parts, and dual purpose functionality. Having items that can perform double duty really helps to reduce the total amount of stuff that is carried.
Bike
My choice of bike is a titanium Moots YBB 29er with a rigid carbon fork. It’s definitely a dream bike for me and I splurged more than I normally would. From a practical standpoint, the YBB gives 1″ of rear travel without any pivots which softens all the bumps without having potential maintenance issues with pivots. The carbon fork was chosen for a lighter front end and no moving parts like a suspension fork would have.
For gearing, the Rohloff internally geared hub gives singlespeed simplicity with 14 gears of goodness. This has been my first experience with internally geared bikes and it has been fantastic.
The final component of the bike I’d like to mention is the dynamo hub and the Luxos U lighting system. It’s worth mentioning the specifics of the light because it gives you so much flexibility. As a light, it’s very bright and works great for night riding. What makes the Luxos even better is the USB output that allows it to charge or run any device without fiddling with carrying extra batteries. My GPS unit gets power from the Luxos as soon as the wheels start turning. I’m also able to charge my phone and iPod on the trail using the USB output.
Bags
The bikepacking bags are J. Paks all the way. They are awesome bags and are handmade locally in Denver. Colorado made and excellent quality – it doesn’t get much better than that.
The frame bag and handlebar bags are custom made to fit my setup and plans for gear on the Tour Divide. Joe at J. Paks even made the handlebar bag so that it slides onto the aero bars rather than using straps to attach it to the handlebars. Simple and effective.
Sleep System
The entire sleep kit, except the pole for my tarp, is stored in the handlebar bag. For me, this makes it easy to setup and breakdown camp because everything is in one place. No thinking involved to remember where each item is stored.
I chose to go with a tarp and bivy setup for it’s flexibility and also because I already owned the super light tarp. On stormy nights, both pieces get used. For clear, calm nights, I opt to go with the bivy only and sleep under the stars.
For comfort, I’ve switched to a full length inflatable pad. It’s worth the few extra ounces to be comfortable when laying on the ground for so many nights. I also opted for a down quilt based on how small it packs and the ability to easily vent the quilt if it gets too warm. Although, using a quilt with a bivy is probably not the norm, I have found it perfectly fine for me and the bivy helps prevent some of the drafty air that can get under a quilt when you move around.
Clothing
Just like I did with keeping the sleep system together in a single bag, all of the clothing items go into the seat bag. I’ve added wool boxers and a wool shirt for sleeping so I can get out the nasty bike shorts at the end of a long day in the saddle. I also use the sleeping clothes as an extra layer if it gets really cold.
Rain pants and rain jackets do double duty as layers to keep warm. Since they don’t breathe, they do a great job at trapping in heat. For me, a base layer, jersey and rain jacket are comfortable down to the low 30s if it’s not raining or snowing.
If it is raining or snowing, I’ve been able to ride 6+ hours in a rain/sleet/snow mix at 30 degrees and stay mostly comfortable when wearing every piece my clothing, except the down jacket. The key is keeping the hands and feet as dry as possible. I’m relying on my cuben fiber mittens and homemade cuben fiber booties to help in that area.
Food and Water
All food and water gets stored in the frame bag and gas tank bag. I chose to go with a 100oz hydration bladder with an inline Sawyer filter. The bladder is easy to take out and fill at a stream or a store. It’s a simple self contained setup that doesn’t require me to find tablets or a filter while riding.
Full Gear Spreadsheet
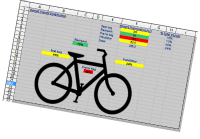
If you’re interested in some of the specifics, all of my gear is outlined in this gear list spreadsheet complete with each item, it’s packing location, and weight. The weight is a bit heavier up front which serves to balance out the extra weight in the back that comes with the Rohloff hub.
Please keep in mind that my setup is different than every other Tour Divide racer. Each person has their own goals, ideas, and take on what works for them. Hopefully, this can help other bikepackers work towards a better setup.
If you have any questions on the approach I have taken or specific gear, please leave a comment below.

