
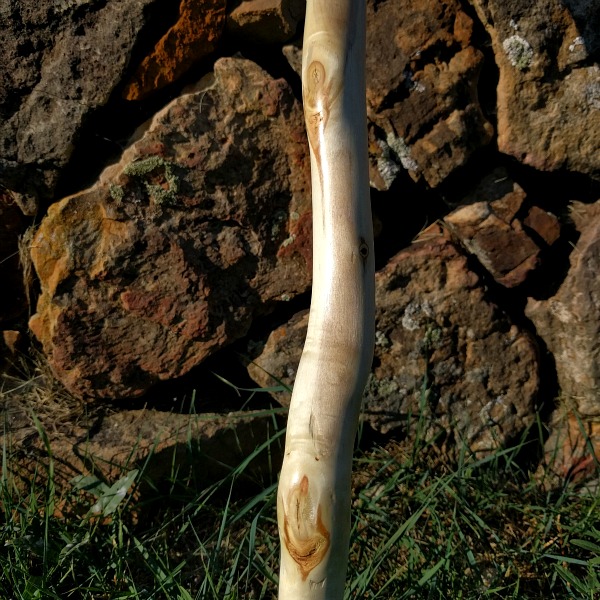
My youngest son outgrew his original hiking stick with the cool orange Turk’s Head wrap.
For his replacement, he chose an aspen branch trimmed from a tree in our front yard. With him being the stubborn kid that he is, he insisted that I leave a section of another branch at the top of the handle. At first, I wanted to cut it flush with the handle, and I tried to talk him into my idea. No go. Not gonna happen.
So we left it as sort of a guard like you would see on a medieval sword. As I debarked the stick, and worked with the handle, the guard reminded me of a penguin beak. Here is the making of “The Penguin”.
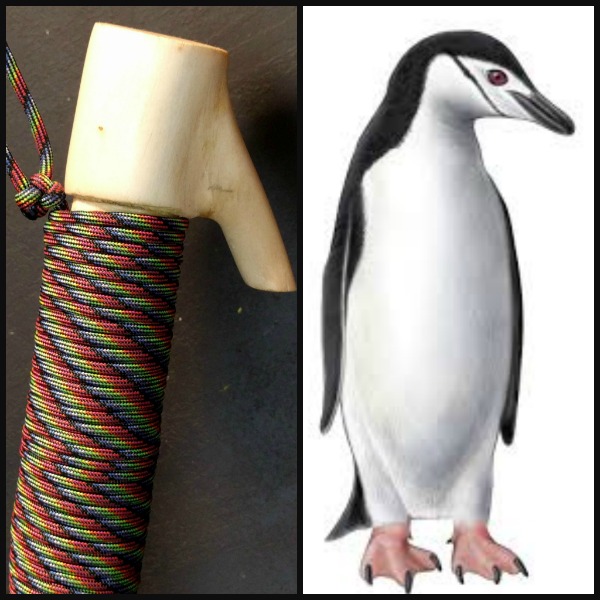
Can you see the resemblance?
Come on. Work with me here.
From Tree Branch To Hiking Stick
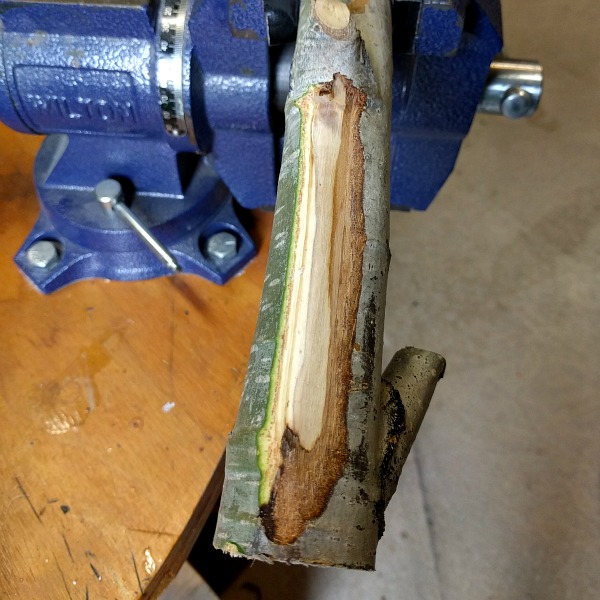
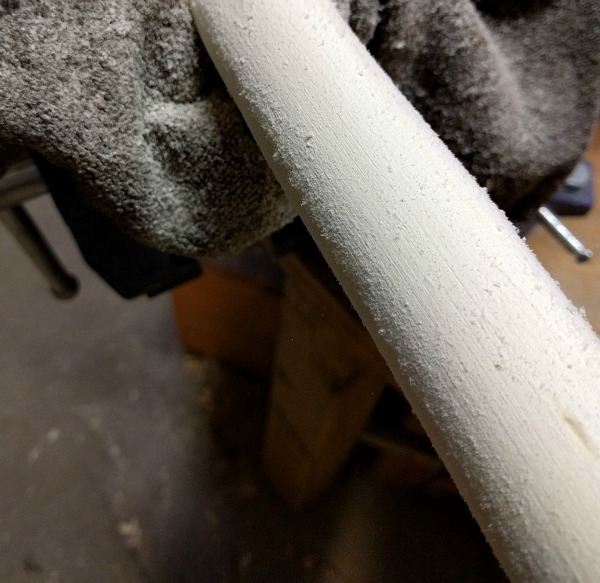
A sharp chisel and a vice to remove the layers of bark.
When making a hiking stick, I prefer to use only hand tools. It is very satisfying to shape a dead branch into functional equipment. While it takes a lot longer, I believe the effort is worth it.
Step One – De-barking
The first step is de-barking the branch. I use a 1″ chisel to get under the bark and shave off long strands of the bark. Be careful around knots or the chisel will gouge into the wood. For larger branch intersections, a hand saw is helpful to cut the junction almost flush with the stick.
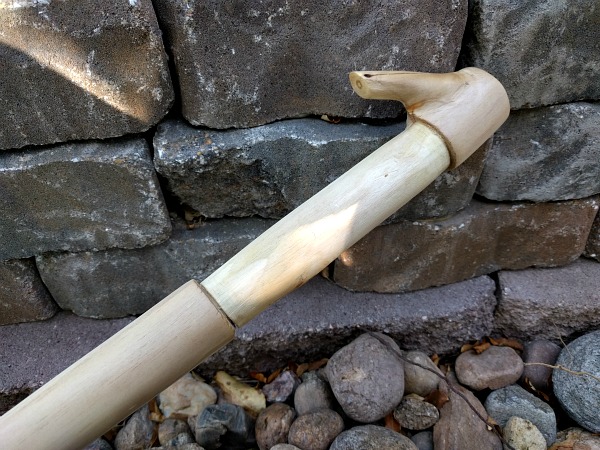
After finishing several hiking sticks, I now prefer to keep some of the imperfections in the wood. Spending hours making a perfectly smooth and straight hiking stick is not required.
Step Two – Recessed Handle
While not required, a recessed handle wrapped in paracord gives the stick a nice look in the end.
Using a hand saw, I cut a ring around the top and bottom boundaries of the handle. It only takes a shallow cut to get started. From there, use a chisel to slowly shave off the inside of the handle. Slow and steady is the key with the chisel work.
Step Three – Sanding
After the bark is removed and the handled recessed, it is time for sanding – the most time intensive yet also my favorite step. There is something almost meditative about hand sanding the branch from raw wood into a smooth hiking stick.
Start with a very coarse paper (60 or 80 grit). Sand, then sand some more, and finally sand some more. This first pass of sanding is where you want to remove any gouges from de-barking or smooth the branch junctions that were cut with a hand saw.
Move on to a 120 grit, then a 180 grit, and finally a 200+ grit.
Step Four – The Finish
The final pass of sanding results in wood that is smooth to the touch. A tung oil finish takes that a step farther while also providing a protective coating and bringing out the wood grain.
I use three coats of tung oil. First, remove any dust left from the sanding process. Then with a cloth, I apply a thin coat of tung oil over the entire stick. Allow it to dry overnight. Using steel wool, perform a very light sanding pass. Repeat this process for two more coats.
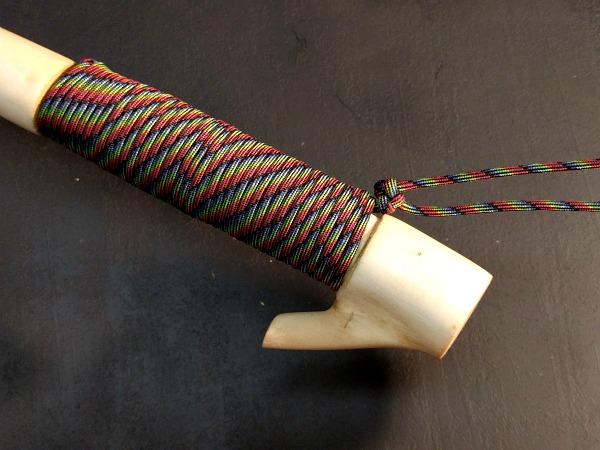
Step 5 – Paracord Wrap
The final step is adding a paracord handle. Many techniques exist for wrapping a handle. For “The Penguin” I chose a simple wrap because my son chose a multi-colored paracord. With the extra time spent recessing the handle, the paracord wrap ends up flush with the rest of the stick.
And now it’s time to go hiking!