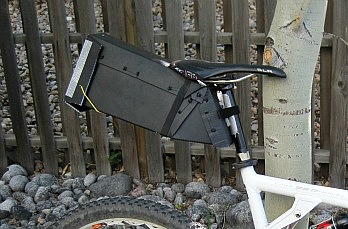
This is a follow-up to the Political Sign post to show the detailed steps of how to make a custom bikepacking seat bag from all of those signs that will be taking over yards and roadsides during this election season.
Overall cost for the bag is under $15 with most of the cost coming from the closure system and the straps to attach the seat bag to the bike. The finished seat bag with all straps weighs in at 10.3 oz.
Obviously, this bag is not as “polished” as ones you can buy for bikepacking, but this works and it’s a cheap way to try out a seat bag. It’s also a good project if you want to try out different shapes or sizes of seat bags.
Materials
- Posterboard
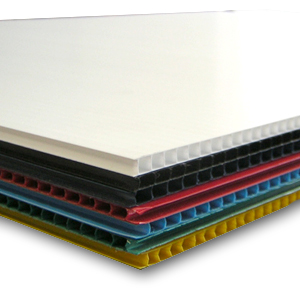
- 2 Coroplast signs
- Zipties
- Velcro
- Refelctive cord
- Straps to attach the bag to the bike
Building the seat bag
Making a seat bag or anything else out of coroplast is not that complicated, but you do have to be patient and be sure to prototype in posterboard first.
The coroplast material is rigid and it takes a bit of work to bend it so you don’t want to be testing out a design with coroplast. Take the extra time to make the first version out of posterboard and then the coroplast assembly will go very fast.
Click on any of the images for a larger view. Hover over the dots on the images to get more details on certain parts of the pictures.
1. Prototype
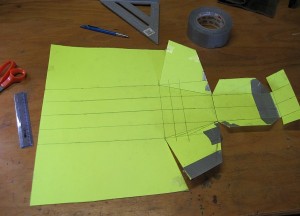
The prototype process takes the most time with this project. Because the seat post is at an angle, and the bag needs to fit under the seat at an angle, it takes a bit of trial and error to get the prototype correct. That’s why you see the duct tape covering up my mistakes in the picture below.
As far as dimensions for the bag, I have found that a tapered designs works well with the portion that attaches to the seat and seat post being 3″-3.5″ wide. Anything narrower and the bag doesn’t have enough volume. Anything wider and your legs will rub the bag. The wider sections at the back and bottom of the bag can be somewhere between 5″-6″.
One sheet of posterboard will allow you to prototype all sides of the bag except for the top and the closing flap. This is ok since the top portion of the bag is a simpler shape and isn’t required to get your prototype to fit correctly.
2. Measure, Cut, Adjust, Cut some more
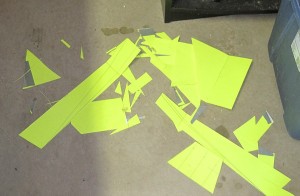
As you can see, the process generates a lot of small strips of trash. Make a small change, test it out, then make another small change until you have the correct fit.
3. On to the coroplast
Once the prototype is completed, trace it on the coroplast and make your cuts with a very sharp razor blade. To make the folds in the coroplast, use a straight edge to make sure the bends are in the correct location, especially on the diagonal bends.
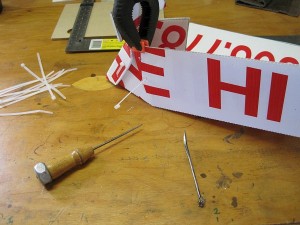
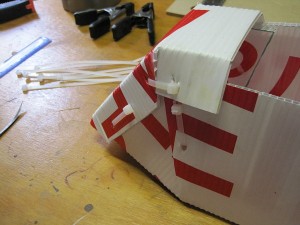
Zip ties function as the stitches to hold the coroplast in position. The “stitches” are generally 1″-2″ long. Use an awl or a wide utility needle as shown in the picture below to put the holes in the coroplast. The utility needle works great because it’s the same width as the zip ties. Unfortunately, I’ve had the utility needle in my toolbox for quite a few years and don’t remember where it came from.
With the first sheet of coroplast, you should be able to build the bottom, sides, and front of the bag. Once the first sheet is completed, you can cut the second sheet to be the top cover portion and stitch it on.
4. Pretty it up
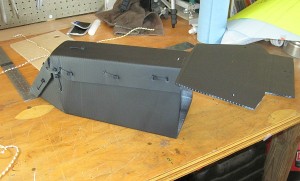
After completion, a quick coat of spray paint dresses up the coroplast and makes it a little more respectable. Not much, but the matte black look is better than the printed signs.
5. The closing flap
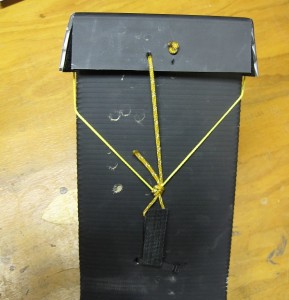
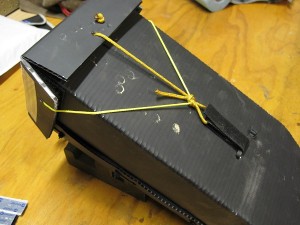
When designing how to close the bag, I used a combination of velcro and cord to make sure the flap stays closed. The initial idea was to use the cord, but that didn’t hold the side flaps tight enough. Once velcro was added to the mix, the flap closes tightly.
The vertical cord has a simple overhand knot tied around the horizontal cord. This allows the knot to slide from side to side for adjustment and for the horizontal cord to be tightened if needed.
Another option would be to put a strip of velcro on each of the 3 sides and use that as the closing mechanism. For this bag and the angles of the coroplast bend, I didn’t feel like velcro alone would keep the flap closed tightly.
Alternate view of the closure system to show how the cord comes together to pull all 3 sides of the flap closed.
Attaching to the bike
More velcro is used to attach the front of the bag to the seatpost. Two vertically placed zipties on the front panel give the velcro a place to thread through.
To attach the bag to the seat, Arno straps rom REI worked the best. The metal spring clip holds the straps tight. Add a zip tie to the top of the bag so that you can loop the strap over one of the seat rails, then down and under the zip tie, and then up and over the second seat rail. This gives a much tighter fit than just looping the strap over both seat rails.
Final Tweaks
The method to attach the bag to the bike is still a work in progress. The current setup holds a fully weight seat bag in place, but the bag moves a bit from side to side on rough trails. I would like to make that a bit more sturdy to prevent the side to side movement. If you have any ideas or suggestions, please leave a comment.
The holes for the zip ties will obviously let in water, so a little bit of caulking can remedy that. In addition, line the seat bag with a plastic bag to give an extra layer of water protection.
The bag also needs a blinky light attached to it. The reflective Kelty Triptease cord and the reflective stickers make it visible, but nothing works like a bright read blinky light.
That should do it. With those final touch ups, it will be a fully functional seat bag for bikepacking.

