Has it really been 2 weeks since I posted on the blog? Oops. This post was almost ready to post before my vacation but things got too busy and it didn’t get finished. Then, the work week after a week of vacation was equally as crazy. So here is the gear organization post with a full two weeks of marinating in my head. With all of the crazy ideas in my head, I don’t think that actually helped make it more readable.
Do you have a technique to keep all of your camping gear organized and ready for use? Or do you just cram everything into a corner of the garage after each trip? The previous post talked about spreadsheet and data geeks, but personally, I’m much more of an organizing geek. Having a clean organized desk, or having my garage with each tool and item in it’s place is wonderful thing.
This probably explains part of the reason I love camping and bikepacking so much. Trying to fit everything in it’s perfect place and repacking until everything is organized correctly doesn’t bother me. In fact, when designing the OutThere kits, I easily spent several hours packing and repacking the kits trying to get them put together “just right”.
Note: This post uses ThingLink for all of the images. Hover over an image and you will see dots that have popup information when you mouse over them. BrianGreen.net is the first place I saw this used and it’s a handy tool for describing pictures of gear.
Why Organize At All?
Besides the obvious reason of being able to find your gear, there are a couple of other reasons.
With your gear organized, you are prepared and it’s easy to pack for a trip. Being prepared covers a lot of areas – gear, first aid while on a trip, communication about where you are going. This is just one aspect of preparedness but it really helps to make packing for a trip less stressful.
When organizing your gear, it also lets you see all of the various items that you have accumulated over time. This gives you a chance to de-clutter your gear. Take the items that you don’t use on a regular basis and give/sell them to friends that are just getting into camping or bikepacking. Not only do you get to help out a friend, but you also get to simplify your gear stash.
I pulled out a few items from my gear list that I haven’t used. They will be posted up in the store soon with all proceeds to be donated.
Organizing Tips
1. As much as you can, try to take over a corner of the garage, basement, or closet to keep your camping gear together. This will help make it easier to pack for a trip and also unpack after a trip.
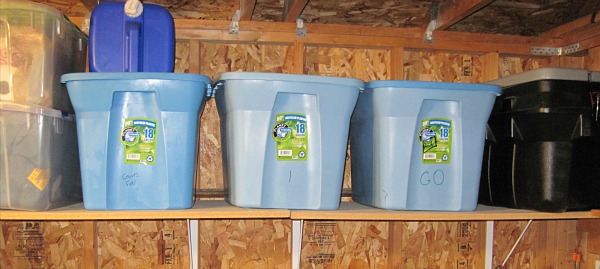
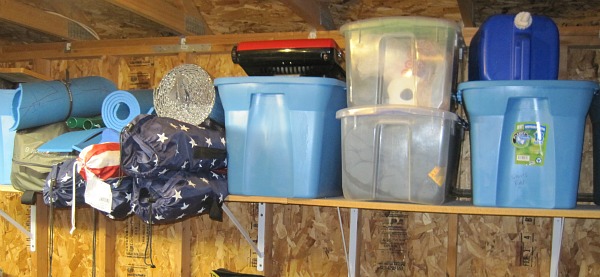
The two pictures below show all of the camping gear that I organize in my garage. It’s not a perfect system but it works for me. The main bins for my trips are the Go bin (the details of this bin are described in a section below) and the #1 bin. If I’m taking a family car camping trip, then a few other bins get used.
Hover over the image and then place your mouse on one of the dots to see more details on what’s contained in each bin.
2. The most important tip for organizing gear is to create a “Go Box”. This box should contain the items that you use most often on your trips – sleeping bag, shelter, ground sheet, stuff sacks, personal care, first aid, tools, etc. By having all of your frequently used gear in one box or bin, you can easily find and pack for a trip.
See the section below for even more details on what’s in my Go Bin. Also, check out Brian’s article on how he has pre-packed bag ready for weekend adventures.
3. Create “Extra” boxes for everything not in the Go Box. Extra box 1 could be items that you may use during specific seasons or for a longer trip. Extra box 2 could hold all of your experimental make your own gear projects. The higher the number, the less likely you are to use that gear on a “normal” trip.
Within each “extra” box, keep like items together in a Ziploc, stuff sack, or smaller box.
4. Being organized will help make your trips more fun because you are less likely to forget pieces of gear. Utilize a gear list along with your organized gear to be certain you pack everything you need for your trips.
5. Keep improving. Just like we do with our actual gear, refine your organization over time. If you find something that stays at the bottom of your Go Box, then move it to another box or bin. If you find you now have 16 firestarters, pare that down to a more manageable number – I think5 or 6 would be plenty to keep you happy.
Details of the “Go” bin
The Go, Bug Out, Quick Access bin makes preparing for a quick 1-2 night trip extremely easy. This bin contains everything needed except clothing and food. For a given trip, not all of the items shown are packed and used, but the key is that they are there and ready to be used.
One example is the stuff sacks and personal care gear. Depending on the time of year or location for the trip, gear may get organized differently and require a different stuff sack. Or for an overnight trip, I can forgo a lot of the personal care gear and just stink it up for one day.
The coffee and shelter system are items that get used for every trip. Those are always must haves.
Organize Away
Nothing spectacular, but hopefully this gives you a tip or two for keeping your gear arranged in an orderly fashion. With this done, maybe I’ll work on organizing the chaos of everyday life so I can get some posts completed and trips planned.
On second thought, that would take way too long so I’ll stick to MYOG and paracord projects along with some bikepacking fun.


